Start Your Own Backyard Flock By Brooding Baby Chicks!
At Rent Backyard Hens we only endorse products that we've personally used or come highly recommended by our trusted peers. If you choose to purchase any items using the product links we've provided below from our affiliate partners, we may receive a small referral commission for the purchase. However, there's no extra cost for you.
Brooding Baby Chicks
There are a few different ways to acquire egg-laying chickens for your backyard flock. You can buy pullets (adolescent chickens) or adult chickens from a local breeder or farm. Or you could pick up a box-full of baby chicks from your local feed store (usually available in the Spring), or even order chicks online from a hatchery and have them delivered by mail. If you decide to raise your chickens from the time they are babies they will require brooding.

What is brooding and how does it work?
Brooding requires special care for your newborn chicks shortly after they hatch to the time they are ready to be moved to their permanent coop outside. The entire "brooding" process takes about six weeks and requires a controlled environment since, as chicks, they are covered with fuzz the first few weeks of life and cannot regulate their own body temperature. Without a broody mother hen to care for them, they will depend on you for their thermal regulation, proper nutrition, and a clean environment in which to grow.
Below is a list of instructions for brooding your own baby chicks and the brooding supplies you will need.
Important: be sure to have all your brooding supplies gathered, set up, in good working condition, and the brooder warmed before your chicks arrive. You can pick up most of these items at your local feed and hardware stores. I have also provided links below where you can find them online.
Supply List
- Brooding Container
- Chick Feeder
- Chick Waterer
- Heat Source
- Thermometer
- Bedding
- Chick Starter Feed
Brooding Container - the brooding container will house the chicks during their first six weeks of life before they can be moved permanently to their outdoor coop. The number of chicks you have should determine the size of the brooding container. Consider at least 6 square inches per chick for the first few weeks and as the chicks grow, you may want to move them to a larger container that allows for 1-2 feet per chick.
A large plastic tote works great as a brooding container. Plastic is also much easier to keep clean than other materials like cardboard or fabric. In place of the plastic lid that the tote may come with, use hardwire cloth or chicken wire to cover the opening of the tote. This will keep the chicks safe inside the container and from jumping or flying out once they get a little bigger. Hardwire cloth and chicken wire can be found in most hardware stores.

Above is an example of a sturdy 40 gallon tote that can be used as a chick brooder. Replace this plastic yellow lid with a hardwire cloth or chicken wire to allow for ventilation and the chicks from jumping out of the brooder as they get bigger and more adventurous. Click here to view this tote on Amazon.
Some other DIY brooder ideas include using a large cardboard box or a livestock watering trough, or even using a wire pet crate designed for large dogs (see photo below). However, if you use a wire dog crate, be sure to line the sides with cardboard to minimize draft and help contain the dust that will be kicked up by the chicks.
Whatever you decide to use should be easy to clean - which will be required on a regular basis.

Above is an example of a large dog crate being used as a chick brooding container. Cardboard panels have been secured to the inside of the crate to help control for dust and keep the chicks safe from escaping. The base of the heat lamp is secured to the roof of the crate by galvanized wire and can be lowered or raised to regulate the temperature for the chicks.

View this chick feeder and waterer kit by clicking here.
Chick Feeder and Waterer- these are specially designed for baby chicks. The feeder should be shallow enough to be accessible to the chicks, and the waterer should be shallow enough that they do not drown.
And here are a couple non-plastic options including a galvanized steel feeder and waterer that use glass jar containers to contain the water and feed.

Heat Source - there are a few different designs on the market but here are a couple recommended standard heat source options depending on how you'd like your brooder set up. These include the traditional hanging heat lamp (pictured above) and the heat plate.
Important: only use heat sources that are specifically designed for brooding baby chicks. Heat lamps and plates meant for other purposes besides brooding chickens can kill your birds. Infrared heat bulbs are a good alternative to white light bulbs in hanging heat lamps as they are less intense for the chicks and less disruptive to their sleep cycles.
Tip: buy two bulbs to have one on hand if the other one goes out on you. The chicks will thank you for it.
Heat plates offer a clever alternative to the traditional hanging heat lamp as they simulate a brooding mother hen and the chicks safely pile underneath the plate to keep warm. Many heat plate models extend vertically to accommodate the growing chicks.

Tried and true, we highly recommend this broody heat plate from Brinsea. We've found it to be durable, easy to use and clean, and very safe to use for the chicks. Click here to view it on Amazon.
Thermometer - the thermometer is used to monitor heat levels in the brooder and should be placed at about chick-level within the brooding container. A simple durable vertical indoor/outdoor thermometer that does not require batteries works just fine for the job. Click here to view this one on Amazon.

Brooder Bedding - will be spread on the bottom of the brooder, about a half-inch thick, and require regular changing over the next six weeks. It's best to use coarse pine shavings. It's not recommended that you use newspaper or sandy material like cat litter. Flattened newspaper not only contains toxic chemicals, it can disrupt their foot development. Anything containing large quantities of grit or sand will be eaten by the chicks and can kill them.
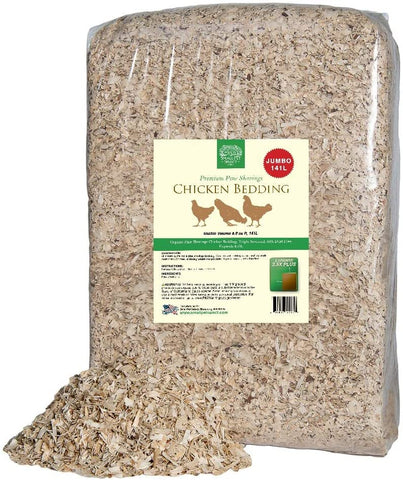
We recommend coarse pine shavings as bedding for the bottom of the chick brooder. These are safe for the chicks, produce very little dust, and are 100% biodegradable and compostable. Click here to view on Amazon.
Chick Starter Feed - will be required until the chickens can be transitioned to layer feed around 18 weeks.

Click here to view on Amazon.
Putting It All Together

Above is an example of a DIY chick brooder setup using a large 40 gal. plastic tote with a heat lamp suspended from a secured 2x4 board. Here, metal wire is used to support the weight of the lamp from the crossbeam, not the power cord. The chicks in the photo are less than a week old. Note that the heat lamp is placed lower in the brooder to raise the temperature for the chicks, but not too close to the bottom to cause a fire or too close to the walls to melt the plastic tote.
Brooder Placement
Depending on the time of year, you may choose to place the brooder indoors or outdoors. The chicks cannot regulate their own body temperature until their feathers come in so you'll want the brooder to be placed in a dry location that's draft-free, preferably near an electrical outlet for plugging in your heat source.
Important: when first placing your chicks into their brooder, be sure to lightly dip each of the chicks beak one by one into their waterer. You're essentially showing them where they can find their water by doing this and avoiding dehydration.
As the chicks grow and begin to develop feathers, they will become more and more active inside the brooder. They love to roost and will attempt it whenever (and wherever) they can - on the waterer, on the feeder, or on anything else you've placed in the brooder. As a consequence, they will stir up a lot of dust and dander with all this activity so it's a good idea to keep the brooder in a spare bedroom or the den, or even in the garage or shed (as long as the garage or shed are not too drafty). It's not recommended that they be kept in eating areas or where food is being prepared, like the kitchen.
Regulating Temperature
If using a domed heat lamp, you may physically lower or raise it to increase or decrease the temperature in the brooding container. If you have the dome too close to the bottom of the container it could be too hot for the chicks and you may see them concentrating to the outer sections of the brooder. Also, if you see them panting, they are too hot. Likewise, if you have the dome raised too far above the brooder you may see the chicks piled up underneath it which may indicate they are too cool. Keep an eye on their behavior and monitor with the thermometer. Happy comfortable chicks will be spread around the periphery of the concentrated light source where it's not too hot or cold.
Brooder Temperature Recommendations as Your Chicks Grow
0 - 1 week old: 90 to 95 degrees Fahrenheit (F.)
1 - 2 weeks old: 85 to 90 degrees F.
2 - 3 weeks old: 80 to 85 degrees F.
3 - 4 weeks old: 75 to 80 degrees F.
4 - 5 weeks old: 70 to 75 degrees F.
5 - 6 weeks old: wean from heat source (< 65 degrees F.)
Once their feathers have come in it should be safe to move them outside and into their coop. Depending on the season, it may be necessary to provide supplement heat in the coop when the chickens are still young, but usually only during the coldest time of the year.
A Few Other Tips & Tricks
- Around two weeks, introduce small cut tree branches or other items for the chicks to perch on. These make great boredom busters and satisfies their natural instinct to roost.
- If the weather is agreeable, after a few weeks in the brooder, take the chicks outside for playtime on the grass. Be sure to keep your other pets away from the chicks and always supervise any outdoor time. Only take them out on mild or sunny days until their feathers have come in completely.
- Pasty Butt. Yes, it's a thing you should be aware of. Since baby chicks can't preen themselves like adult chickens, they'll need a little help from you from time to time to keep their rear ends clear of dry manure buildup. Essentially, dried poop will build up around the vent and can create problems with elimination if it ends up drying over the vent. Pasty butt can be conquered by hydrating the dried mass with a warm damp towel while holding the chick in one hand and the damp towel in the other. Patience is key during the process as it will become relatively easy to wipe away after several minutes pressed up to the wet towel. Avoid pulling dry pasty butt off the back of the chick as it can tear the skin and create more problems.
- Keep it Clean. As the chicks grow their brooding container will require regular cleaning. Their bedding eventually will need to be changed daily. They will also inadvertently poop in their food and water troughs while perching on them so you'll want to check those regularly and change the water frequently. Be sure to discard soiled feed. Keeping things clean will avoid harmful diseases such as Coccidiosis.
Raising your own backyard chickens can be a very rewarding and enjoyable experience. We know from experience that the time you take to prepare and get set up correctly with your brooder and outside coop will definitely pay off in the long run. We hope that you found this article useful. Please feel free to drop a comment below - we'd love to hear from you.